
After 40+ years of cooking chili, I feel like I am starting to get the hang of it. All I have been doing, all that time, is trying to adapt rules set down by the founding fathers in Texas, to my own kitchen at home.
So this is an update to my page originally posted in 1998. Not much has changed. I am still a minimalist – trying to keep it down to only four or five ingredients (that’s with counting a blend as only one.)
If you want actual recipes to get going, definitely start with the ones at the end of Ray Calhoun’s wonderful guide for pro cooks – “Preparing Competition Chili.” They are a little fussy, but you will get the main ideas really quick. These are also sold as complete kits from Pendery’s and a few other places. Cooking a few of those kits is the quickest way to see what this is all about. I am just here to tell you what works for me.
Philosophy
So here are the main ideas from 100+ years of chili history
- Meat should probably be chopped. “Chili Grind” meat is a shortcut.
- Red meat should be used. (I prefer London broil, Chuck roast, or “stew meat.”)
- I do use beans, unless it is an actual local contest. (Here is why not to use them.) Pinto beans in a pressure cooker are super easy and take about a minute to cook. I don’t add them until the chili is done. Usually the next day.
- The goal is for the meat to be the only identifiable solid ingredient.
- Chili is not necessarily “hot” or “spicy.”
- Nearly all cooks will agree that what matters is technique, not so much the ingredients or recipe.
Chili Blends
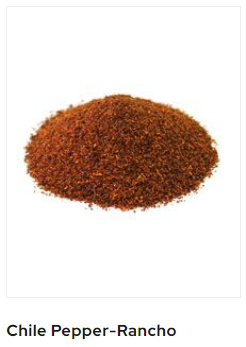
There is a difference between Chili powder (powdered chile peppers) and Chile “blends” (commonly called Chili Powder in grocery stores.) The blends add cumin, garlic, oregano, salt, and so on. If you want to try blends, avoid the grocery store and get the real thing from Pendery’s. “Pure” ground chile pepper is also sometimes known as “Chile Molido.” Many pro cooks start with that to mix up their own blends – and if they win the Terlingua competition, sponsored by CASI – they might sell the whole thing as a “kit.”

If you want to get adventurous right away, here is a basic chili blend recipe that will give you surprisingly good results:
- 60% powdered chile pepper
- 15% ground cumin seeds
- 10% dried chopped onion (powder)
- 5% dried chopped garlic (powder)
- 5% mexican oregano
- 5% salt
- pinch of MSG (optional)
Note: dried spices are really only good for 6 months at best. Clean out your spice cabinet, get rid of those old bottles and tins that have been sitting there for years, and go shopping at Pendery’s!
I tried dozens of blends – even “famous” grocery store ones, like Carroll Shelby, (which is not bad.) I did my own from scratch many times. For the past few years I have mainly used a combination of Dallas Dynamite and New Mexico Light. I start with the DD after the meat is done, and “finish” with NML about 30 minutes before the end. I often will add a bit more NML even after it is almost cooled. That is not to say that I don’t try others from time to time – it is always an adventure.
References
The beginning
The reality is that the original authentic, traditional chili was created by native Americans to be a high-fat, extremely efficient and portable food for people who lived and worked under harsh and/or cold conditions. (That is one reason why, to this day, many restaurants only serve it in the winter.) It was very popular with the army during the civil war, and with what you might call “cowboys” today.
The first chili started out as chopped beef jerky to which fat and peppers were added. This is known as “Pemmican.” The peppers, oregano, and a few other things were simply found growing along the trails. The high-capsaicin peppers have a preserving effect. (Some might say that it works on humans too.)
Such people tended to have a big appetite, and chili might have been all they had to eat for quite a while. Chili was also very popular during the depression. It has always been a good value.
For whatever reason, you might find that you want to make a “lighter” version. Peanut or Olive oil can be substituted for animal fat. You may want to add more chopped vegetables and less meat. Using more chopped, fresh vegetables, (and less dried) is an interesting pursuit, but you will find that while the finished product is very good, it isn’t really chili. Chili depends on the rich, thick gravy formed by large amounts of reconstituted ground pepper, combined with fat, to form the gravy. You could also consider chili a “condiment,” instead of a meal… see Cincinnati Chili below.
Meat
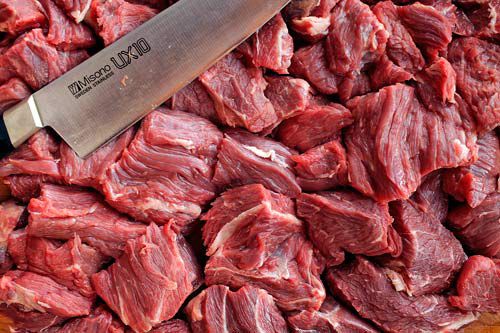
Take the meat and put it in the freezer for about an hour, then cut out any gristle and slice into cubes (as small as you have the patience for.) This is the most labor-intensive part of the preparation, and can be done ahead of time, like the day before. Make sure you freeze it again if you do, and thaw it out completely before cooking. If you find that the meat is too “mushy” to cut into cubes, then you probably have the wrong meat.
It should be firm enough to stand up on it’s own. If you have access to a GOOD butcher, you may be able to get them to grind your meat roughly enough to make chili. If they are any good, when you say “chili grind” they will know what you are talking about.
Browning (or as the pro cooks more accurately call it, “greying”) is a way to seal in the flavor of the meat. I also like to sprinkle in a bit of chili blend while doing this.
Onions and Garlic
I sometimes use fresh onions – but oddly enough, I have found that the dried variety works just as well, and yields a better texture. Same goes for garlic. I use “granulated,” not “powdered.”
If you want to do that, use a food processor, and chop them up together, as finely as possible. You need to fry this up before adding your meat, maybe 10 minutes.
Spice prep and grinding
You can get the best flavor and aroma from many spices by starting with whole seeds, and grinding your own. At the top of the list is cumin. I get a fresh batch of cumin every six months no matter what. One of the things I learned from Asian cooking techniques is to toast the cumin before grinding. Just take whatever you need for the recipe and throw it into any old saucepan. Put the heat on high, and shake it around about every 30 seconds. After a minute or two, you will smell that wonderful aroma. If it smokes, take it off immediately. One or two minutes should do it.
Then grind it. The best grinders for spices are the small cylindical ones meant for coffee. Beware – once you start using it for spices, it can’t be used for coffee any more – and they aren’t very cleanable.
Beef and Chicken “broth”
Most of the classic Terlingua recipes call for this – but what is it really? If you are a purist, you can make your own from meat cuttings, a whole chicken, etc. – which is a day’s work in itself. I used the lower cost store brand stuff for a long time, until I realized that it is totally artificial and has a chalky taste. There is a reason why you see all those more expensive brands there on the shelf – just do it. The latest fashion is “bone broth” – which is marketing of course, but it works.
Cooking stages and “dumps”
The pro cooks who package their spices in kits will almost always have them separated out into “dumps” – separate packages to be added at various stages of cooking.
Also – try not to let it get too hot! There is an old saying, “chili boiled is chili spoiled!” It is especially tough on the pepper or blend.
I have settled down to three fairly distinct stages of cooking:
- The meat stage
- The blend Stage
- The finish
I finally realized that putting in most of the blend while meat is cooking is a waste. Some ingredients are more “durable” than others. Chile powder and blends change dramatically over a period of cooking time, and even afterward. So I do the meat for several hours, with nothing added except the broth and maybe some dried pequin, and a whole fresh pepper. That’s the meat stage. I can walk away from it for two or three hours and not worry.
Once I add some blend, I am very careful. The blend needs 15 minutes minimum, then I taste and adjust. The pepper will “bloom” and combine with the fat and juice from the meat produced in stage one. Lots of stirring at this point.
“Finishing” usually refers to adding a lighter colored/lighter flavored pepper or blend, for appearance and a final adjustment in taste. This is where you set your final level of “hotness.” Plain ground cayenne is great for that, but I sometimes also like to grind my own favorite dried Asian peppers for this too. Paprika will get you your red color.
Last but not least, tasting at every stage is fundamental to a successful batch. In other words, even before the meat is done, it should taste good… kind of like a “meat soup.” After the Blend is added, we should start thinking about adjusting salt, among other things. It should start to taste like chili now. At the finish, it should be “almost there” – but I have been known to add some more cumin, etc.
Why no beans?
Why no beans? Because as experienced bean cooks know, they are the opposite of Chili when it comes to freshness and preservation. There are separate competitions for those. Beans are best just after cooking, and after about 3 days are not much good at all. But refrigerated competition-class Chili is still good weeks later. By the way, Pinto beans are the only ones serious cooks will use. Kidney beans are for yankees.
Pendery’s
You need to get in touch with Pendery’s. I have been ordering from them since before the Internet. Back in the day, the Pendery family had a hand in inventing chili as we know it. This is the place for any and all your dried spice needs.
Cincinnati Chili
Of all the variations on original Texas chili, too numerous to mention here, there is one that I especially enjoy. “Cincinnati Chili” has almost as rich a heritage, and is really not that far removed from the early “bowl of red.” DeWitt Clinton Pendery himself lived in Cincinnati before he lived in Texas. However, technically, there is no relationship…
Greek History
To really understand Cincinnati chili, you need to take a look at its origins. Cincinnati chili is not a descendant of Texas-style chili, but instead of a Greek dish called pastitso, which is layered pasta, cheese and meat sauce flavored with cinnamon, allspice and clove. It is also closely related to saltsa kima, a tomato-based sauce similar in style to an Italian bolognese, but with the sweet Greek spice profile. In the 1920s, immigrants opening restaurants were looking to adapt their own, familiar foods. Macedonian immigrant Tom Kiradjieff began serving this sort of “chili” on top of hot dogs at his restaurant, Empress (named for the burlesque theater next door to his original hot dog stand). The Kiradjieffs also established the “ways” to simplify ordering, which have been expanded upon over the years. For the record:
- 1-way: No one orders this, but it stands to reason that 1-way is just chili
- 2-way: No one orders this, either. It’s chili and spaghetti
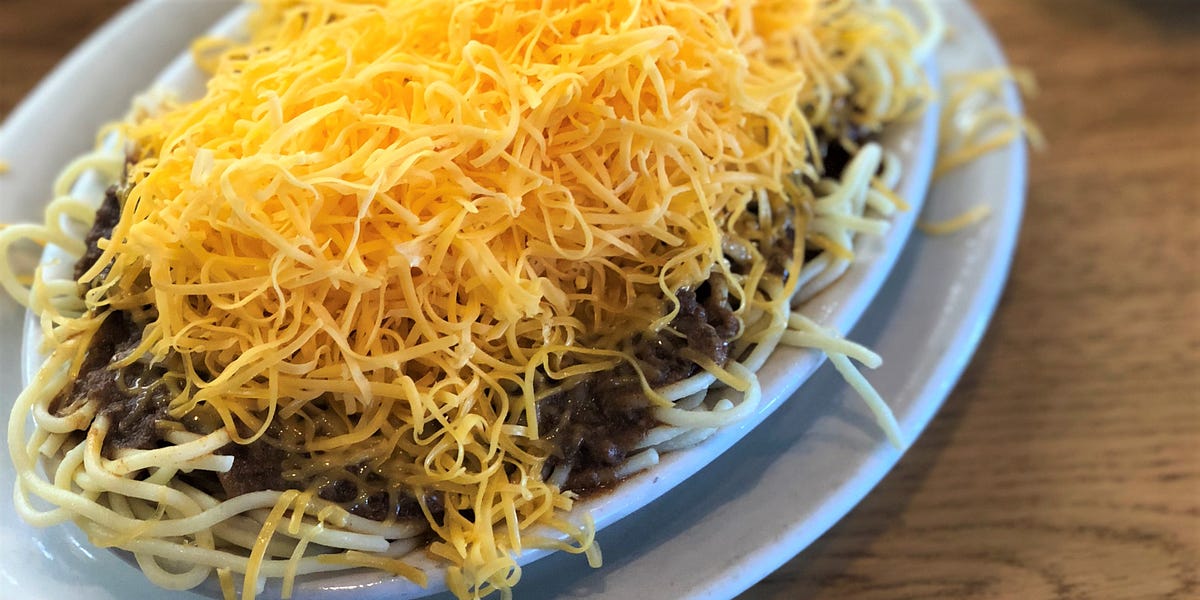
- 3-way: Chili, spaghetti and a generous topping of highlighter orange cheese
- 4-way: A 3-way with the addition of beans or onions
- 5-way: A 3-way with both beans and onions
- 6-way: Depends on the parlor. Dixie Chili adds garlic. Blue Ash Chili adds fried jalapeno caps
Layer ORDER on a five-way:
This is usually served on a large platter. The first layer is a large helping of spaghetti. The next layer is ladles of Cincinnati chili. Next comes a layer of kidney beans. Chopped onions are piled over the beans. The entire dish is then crowned with lots of grated cheese, usually Cheddar.
a recipe
This recipe is a compilation of “leaked” “secret family recipes” from Empress and Skyline. Remember, in this case, the Chili really is a condiment… so making it on the “strong” side is no accident. And the cooking part is really quite simple.
The fundamental section: (must use)
- 2 lbs. chili-grind beef
- 2 medium onions, chopped
- 2 cloves garlic, mashed
- (1) 8oz. can tomato sauce
- 2 cups water
- 1 tbsp. red wine vinegar
- 2 tbsp. chili powder (not blend)
- 1 tbsp. Paprika
- 2 tsp. freshly ground black pepper
The variable section: (use any or all)
- 1 tsp. honey or sugar
- 1/2 tsp. cumin
- 1/2 tsp. marjoram
- 1/2 tsp. allspice
- 1/4 tsp. cinnamon
- 1/4 tsp. cloves
- 1/4 tsp. mace
- 1/4 tsp. coriander
- 1/4 tsp. cardamom
- 1/4 tsp. crumbled bay leaf
Brown the beef, onion & garlic. Add the tomato sauce and the remaining ingredients. Simmer at least two hours, stirring frequently. That’s it!